How to Install Heated Floors Under Hardwood
Electric floor heating systems combine the beauty and durability of tile or hardwood with the warmth and comfort of heat to bring luxury into any space. Heated floors have become very popular among homeowners for many reasons, primarily because the gentle heat released through the floors during colder months add unparalleled comfort and style. If you’re considering installing heated floors, here are some tips to get the job done right.
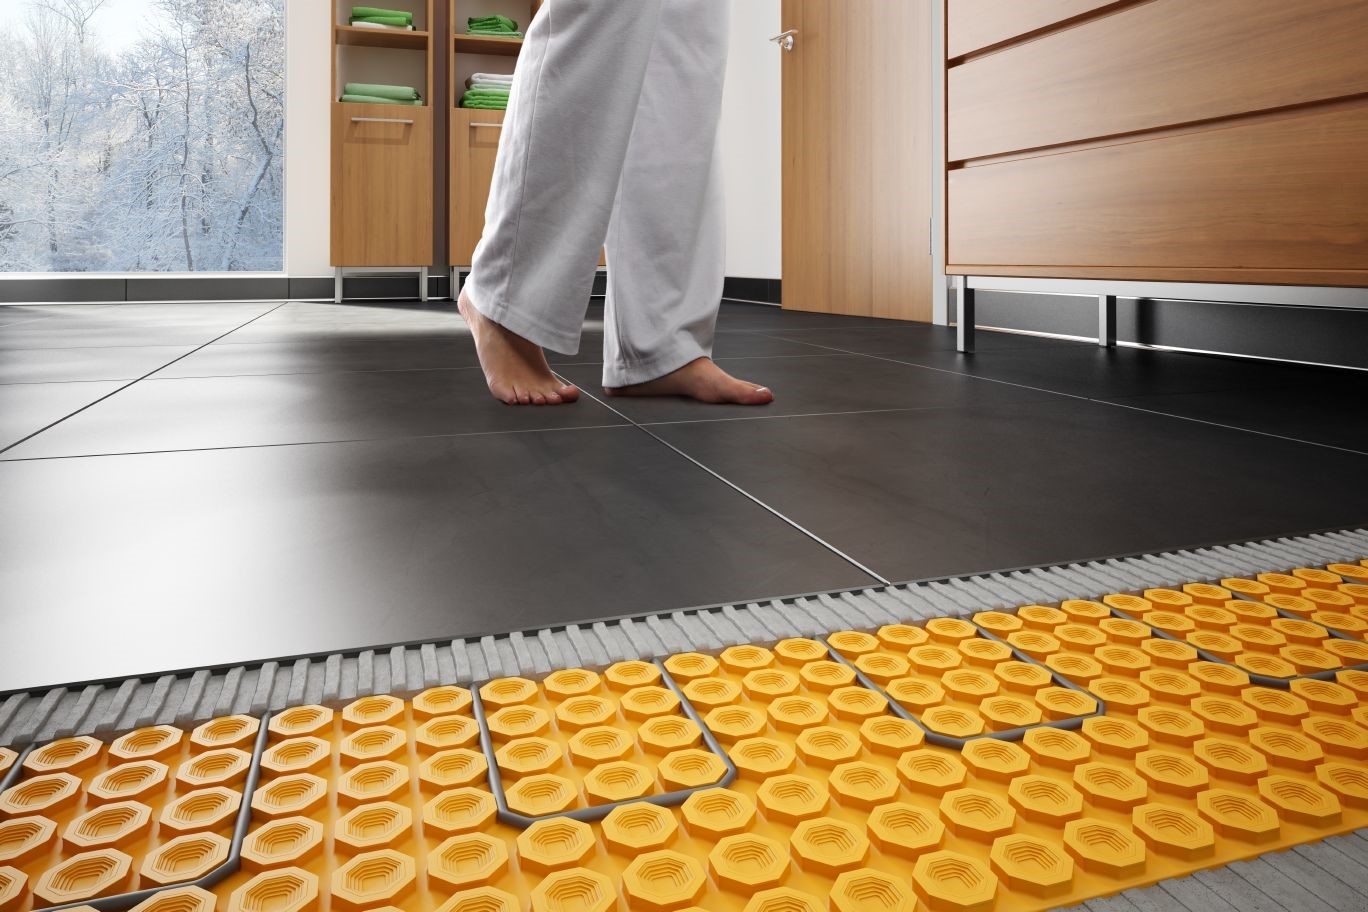
Schluter Ditra-Heating System
There are generally two styles of underfloor heating systems: heating cables and heat mats. Depending on the type of heating system you choose, the installation process will be slightly different. The best heating system on the market today is the Schluter Ditra-Heat membrane and cable system. It is the only system that directly incorporates uncoupling technology to make the flooring less susceptible to cracking, and it is the thinnest system on the market. The cables can be places wherever the homeowner desires for customized heating zones. No levelling compounds are needed for this system, making installation a breeze.
Steps to Follow during Installation
1. Choose the Right System: The Ditra-Heat system comes with the uncoupling membrane (available with integrated sound control and thermal break), all-inclusive electric floor warming kit, heating cables for the membrane, power module, and thermostats.
2. Carefully Plan Installation: Before you can install the system, you must measure the square footage of the room. Ditra-Heat cables cannot be cut, so make sure you do not install it under areas that should not have heat.
3. Set the Membrane: Mix up the thin-set so it is slightly loose, but can still hold the trowel ridge. Dry fit the first sheet of membrane and be sure to keep it at least 1/8 to 1/4 inches away from the walls. Cut membranes with a utility knife and clean the subfloor with a damp sponge and water to stop the wood subfloor from sucking the moisture from the thin-set. Place the thin-set and then the membranes.
4. Check Electrical Elements: Make sure the heating cables are grounded, and carefully follow the manufacturer’s instructions to test the conductor resistance, conductor and ground braid continuity, insulation resistance, and floor temperature sensor. You can find the handbook on the Schluter web site.
5. Heating Cable Installation: Installing the Ditra-Heat cable is very simple. Mark off any areas that the cables cannot be under with painter’s tape. Each cable will have a cold splice, which needs to be set in the membrane. Adhere the cold splice to the subfloor using a hot glue gun. Make sure the heating cable is exactly three studs apart to prevent overheating and damage to the subfloor and surrounding structures. Any wider, and you will not have enough power to heat the floor.
6. Thermostat Sensor Installation: Sensors should be placed evenly between the heating cables, 24 inches away from the wall without overlapping or crossing the cables. Place the sensors in areas that will not get too much direct sunlight to prevent it from misreading the temperature in the room.
7. Install the Thermostat
Common Problems Faced During Heated Floor Installation
Heating System Won’t Turn On
One of the biggest frustrations for anyone installing heated floors is to realize there is a failure in the system. In most cases, this happens because the cable has been nicked or damaged during the installation process.
Overheating Thermostat
It is very alarming to realize after installation that the thermostat is overheating or melting when the system is turned on. This is typically caused by overloading the circuit.
Uneven Heat Distribution
Cable spacing problems during installation can lead to some areas of the floor feeling warmer than others. If the entire floor is colder in some areas than others, it could be caused by a lack of insulation.
Tripped Circuit Breaker
To properly operate an electric in-floor heating system, proper wiring is a must-have. The type of circuit breaker in your home should not be ignored. Make sure you do not have an incorrect breaker to prevent tripping. Damaged wiring is also a possibility, although it is not very common. This is why performing all testing is vital to a successful installation.
Why Consult with Our Professionals?
If you’re considering installing heat under your hardwood floors, begin by sourcing the right materials, and getting expert advice from other installation professionals. Choosing the right company to source your materials from or hiring the experts to take care of your project will ensure that you get the best possible job done when you’re ready to upgrade your home.
If you need materials for indoor floor heating, visit Centura Tools. We offer a variety of products including tile gutters, large format tile tools, in-floor heating products, Schluter products, tile levelling systems, flooring products, high-end tools, professional equipment for flooring and tile installers, and more. Even better, we don’t limit ourselves to local brands. We source our products from countries like Germany, Spain, Italy, Japan, and the U.S. to offer the best prices and the best products on the global market. If you are looking for something you don’t see in our store, let us know and we can source the specific items you need. Contact us at (416) 785-3311 or visit our store to see our amazing products.


